This feature allows you to put additional text on the bottom of POS receipts. This feature was specifically developed for printing detail regarding promotions that require extra text at the bottom of the receipt.
This feature is exclusive to ‘Support & Maintenance Plan’ customers and requires you have the ‘Support Module’ activated. To check this open your Synergy Auto Shop or Financials (back office) program and go to ‘Help’ > ‘About Synergy’ > Select the ‘custom modules’ tab and you should see ‘Synergy Support Module’ listed. If it is not present you will have to email info@synergy.net.nz to request an activation code.

This feature also requires PumpLink Version 10 Build 16.6 or above. You can check your POS build number within POS by selecting ‘System Maintenance’ from the POS Main Menu, then clicking ‘System Details’:

IMPORTANT NOTES:
This feature requires the installation of new POS receipt files (a download link will be provided below). Please be aware that if you have receipts that have previously been customised, installing these new receipts will overwrite your old receipt forms and you will lose your customisation. These receipts are to be used only if you print all your receipts to an 80mm thermal receipt printer, not to be used if you print receipts to an A4 paper printer.
Installation & Setup Instructions:
Notes, if you have POS / PumpLink on more than one PC, you will need to follow these steps on BOTH POS computers.
Installing the Promo Receipt Forms
- We strongly recommend you perform a full backup of your POS folder
a.Usually this is “C:\POS”, you can confirm in Windows 7 and above by right-clicking your desktop shortcut to POS and selecting ‘Open Target’ which will open the folder your POS program is installed into. - Use the link below to download the POS Promo receipts installation program, once downloaded you will need to run this file and follow the on-screen prompts:
http://www.synergy.net.nz/downloads/files/pospromoreceipts.exe
Configuring Your Promo Text
- Open POS/PumpLink and select ‘Setup’

- In the Setup menu, select ‘Forms’ in the left column

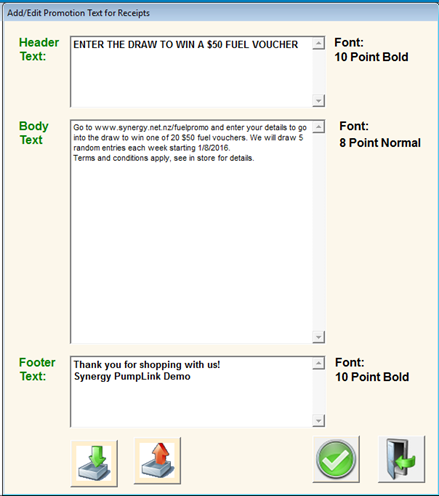
- In the Forms section, you will see a tickbox in the bottom right labelled ‘Use Promotion text on Receipts’. Tick this box, and a new button will appear labelled ‘Add Promotion Text’ – click this button:

- This will load a window where you can enter the details you wish to print at the bottom of your receipts. This is broken up into ‘Header’ (in large text), ‘Body’ (in smaller text) and ‘Footer’ (in large text). See the example of the setup and an example receipt below:
Example Receipt:
